There are many ways to create circular holes in Blender, and one of the most commonly used methods is through the Boolean modifier. However, applying this modifier often requires additional adjustments to the mesh to avoid deformations. That’s why today, we want to show you a quick and effective way to create holes while maintaining a clean mesh.
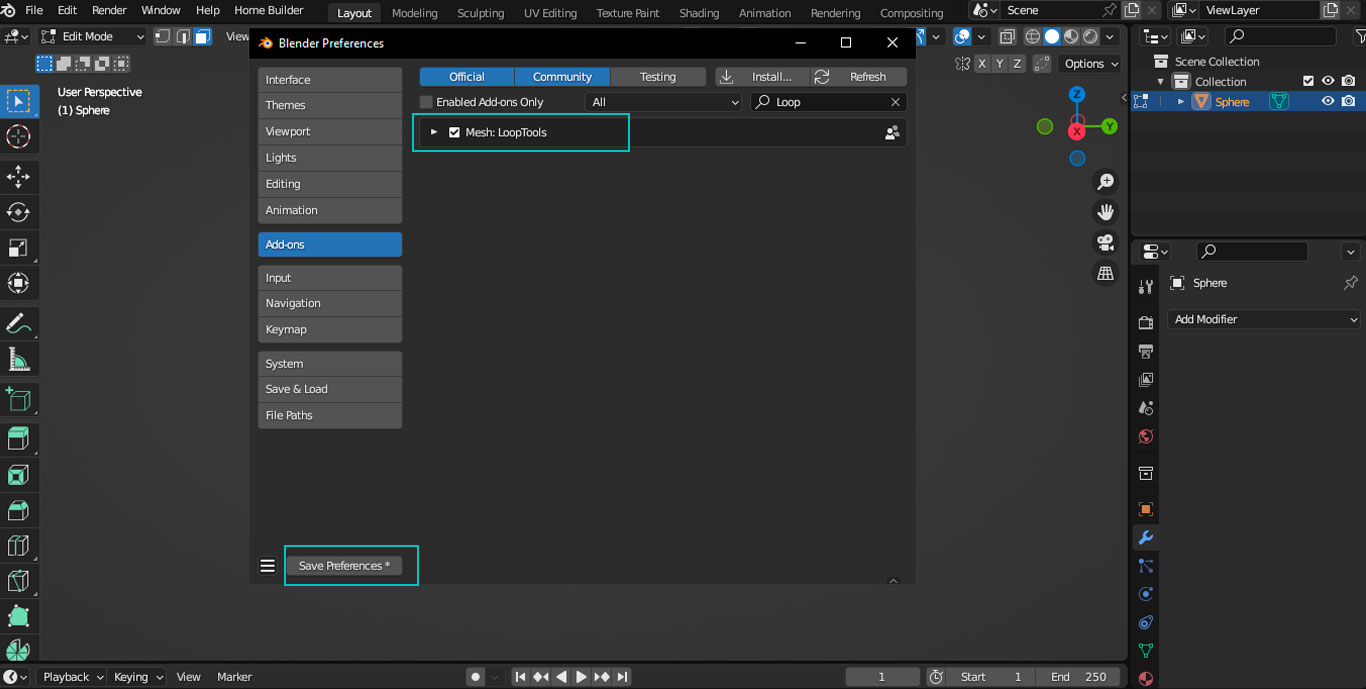
To achieve this, we need to activate the LoopTools addon.
Loop Tools
is a highly useful addon for Blender as it provides several tools that streamline tasks such as deformation, vertex redistribution, surface smoothing, and topology correction in the mesh.
If you haven’t activated this addon yet, simply go to the Edit menu -> Preferences or use the keyboard shortcut F4 -> Preferences.

Next, in the Add-ons tab, search for Mesh: LoopTools and enable it. Don’t forget to save the preferences if you don’t have automatic saving enabled.
Once the addon is activated, the next step is to create the circle that will form our hole, so in Edit Mode, we select the faces where we want to place the hole.

Next, right-click and from the list of LoopTools options, select Circle.

Upon doing so, we will notice that the selected faces form a circle, keeping quads in the geometry.

The next step is to extrude the circle inward into the surface.

And voilà! That’s how easy it is to create a circular hole.
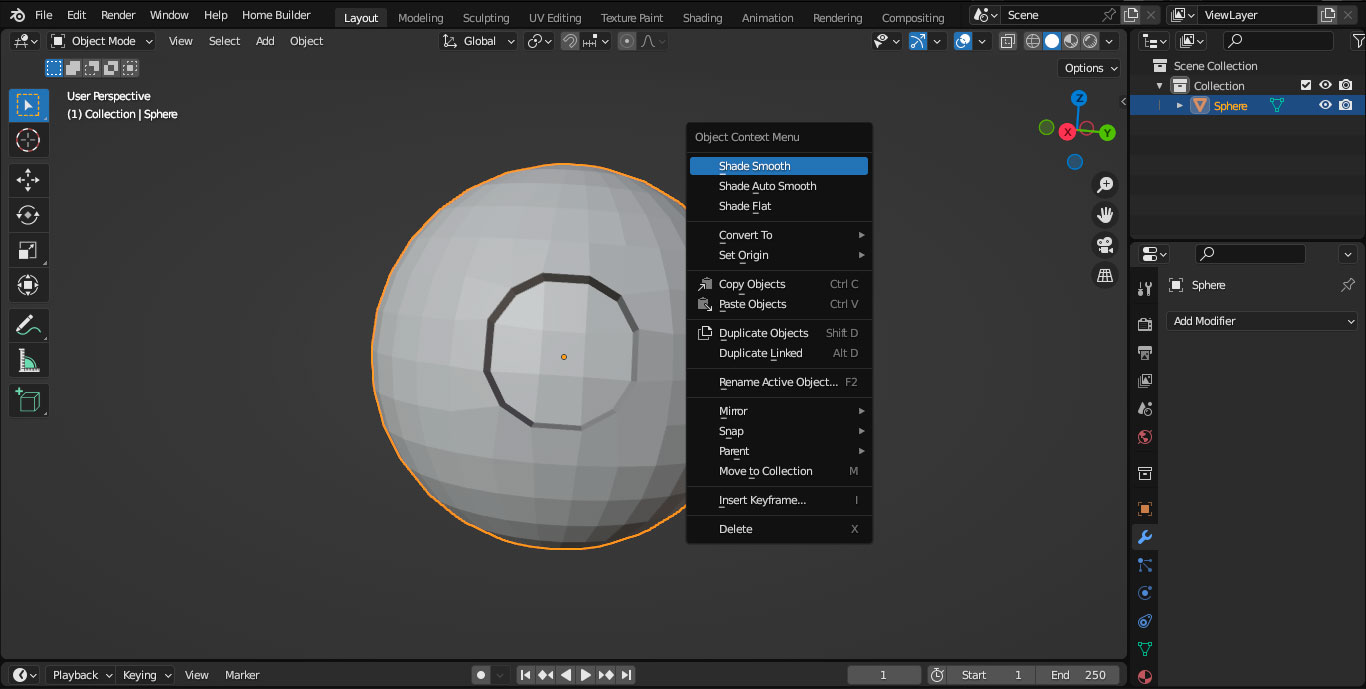
The following steps involve smoothing the mesh to achieve a better appearance. To do this, switch back to Object Mode and right-click to apply Shade Smooth.
Subsequently, apply the Subdivision Surface modifier. Then we add support loops with the key combination Ctrl + R to get a better definition of the edge of the hole.

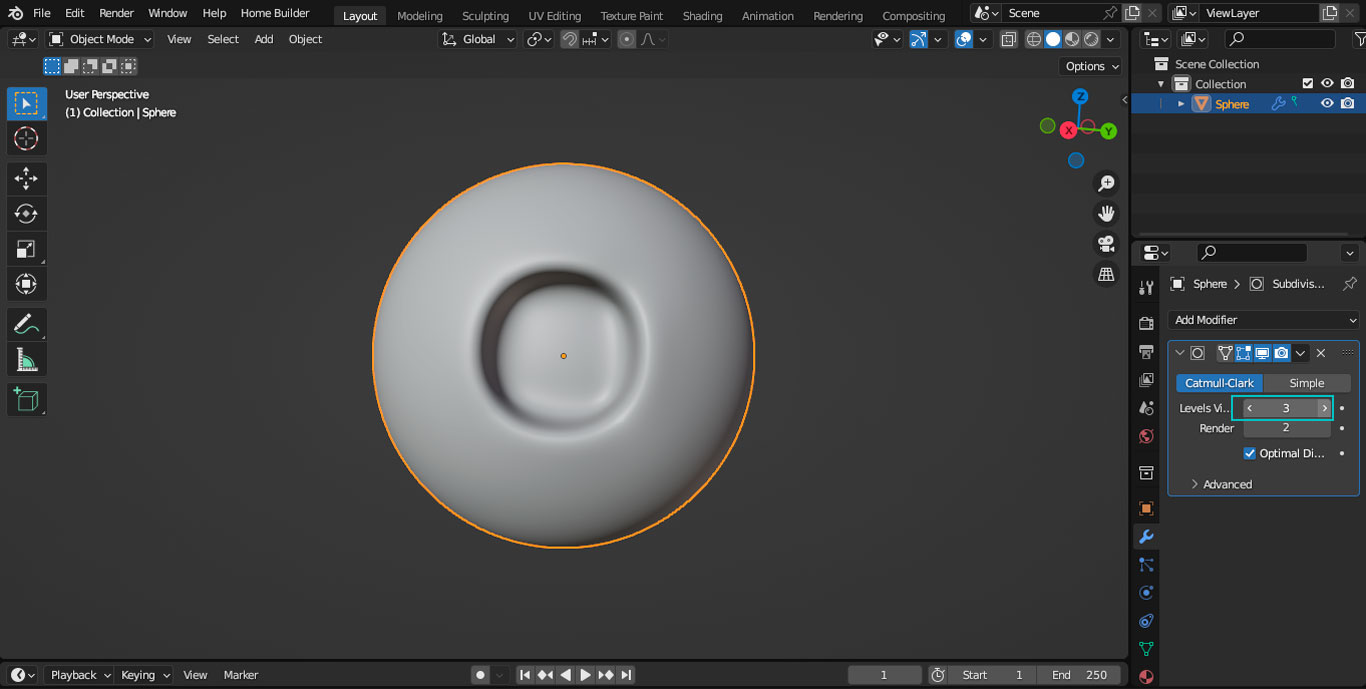

In the following image we can see the final result.

Here, the video with the complete process.
This method can be applied to any model you want to make circular holes in Blender. Sometimes it will be necessary to apply support loops before extruding, but in general these are the steps. We hope you find this information useful.
Thank you for reading, until next time.