Today we are going to show you how to create a room structure in Blender with collisions, which we will then import into Unreal Engine. The size of the room is 2×2, but this will of course depend on the individual needs of your project.
In our case we have chosen this size for demonstration purposes, to explain different aspects such as performance and collision creation.
Wall creation
Let’s start by creating a simple wall. Taking into consideration that the standard size of a door is 90 cm wide by 200cm high approximately, we will create the wall of 3 meters high (this is a personal taste, and will depend on the size you require for your project).
But before creating any geometry we will make sure that we have the Grid option activated in the Viewport Overlays section (so that the Blender grid is visible in orthographic views), and the Snap tool (which will help us to create meshes with more accurate sizes).

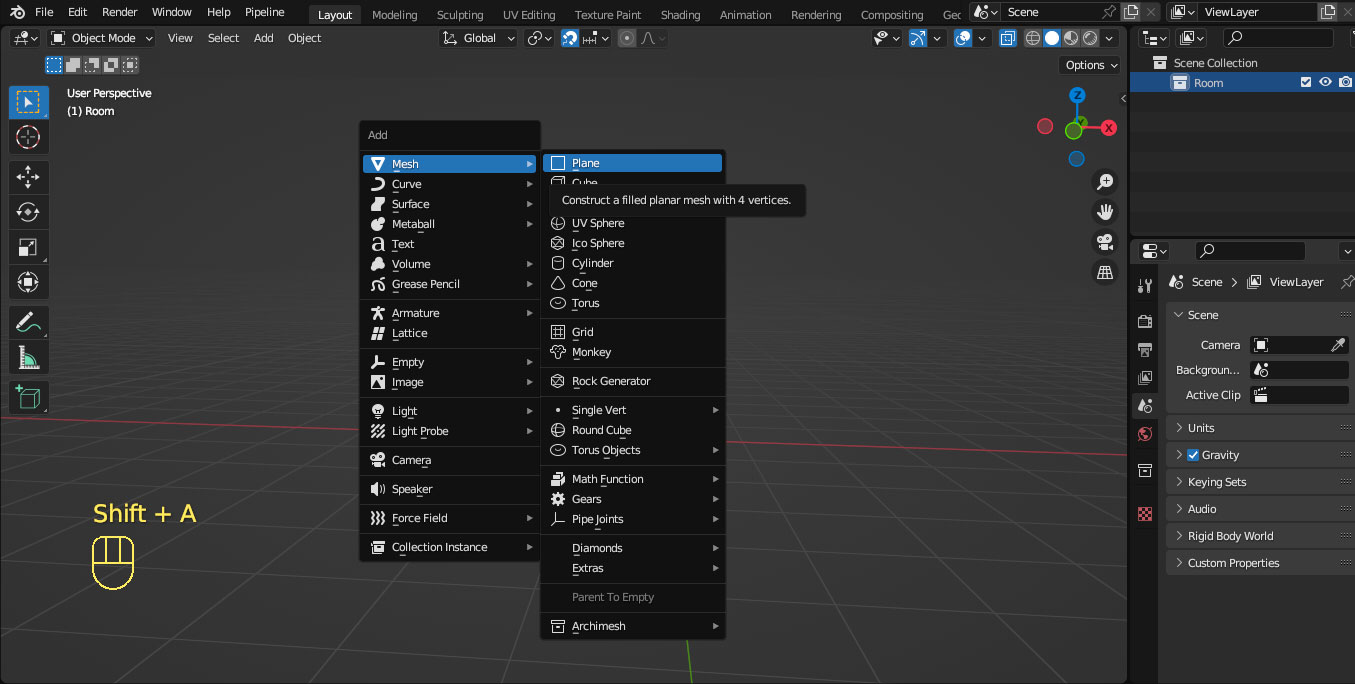
Once both options have been verified, we will proceed with the creation of a plane. To do this, we use the keyboard shortcut Shift + A and select the option Mesh -> Plane.

In Edit Mode, we press 1 on the numeric keypad to place ourselves in an orthographic front view, and rotate the plane on the X-axis 90°.

Then, by pressing the G key we move the plane on the Z-axis so that it is just above the X-axis.
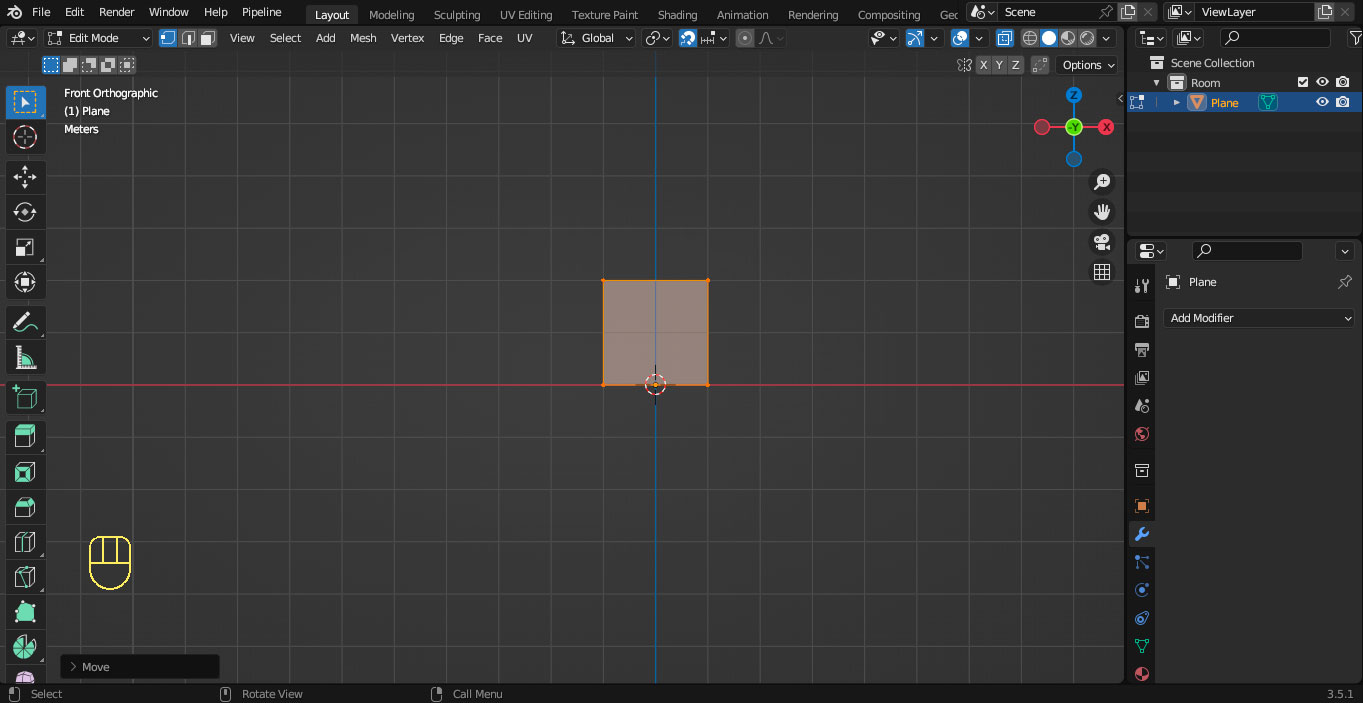
Subsequently, we move its top edge to bring its height to 3 meters.
In Blender, each visibly larger square represents 1 meter, while each square that composes it represents 10 cm. As we have the Snap option activated we will notice that the movements of the geometry are adjusted to the grid being more precise.

Wall duplicates
Again in Object Mode, we duplicate our wall with the keyboard shortcut Shift + D. And going back to Edit Mode, we move the duplicates to one side.

Creating space for the door
Once we have our walls created, it is time to define the wall corresponding to the door of the room.
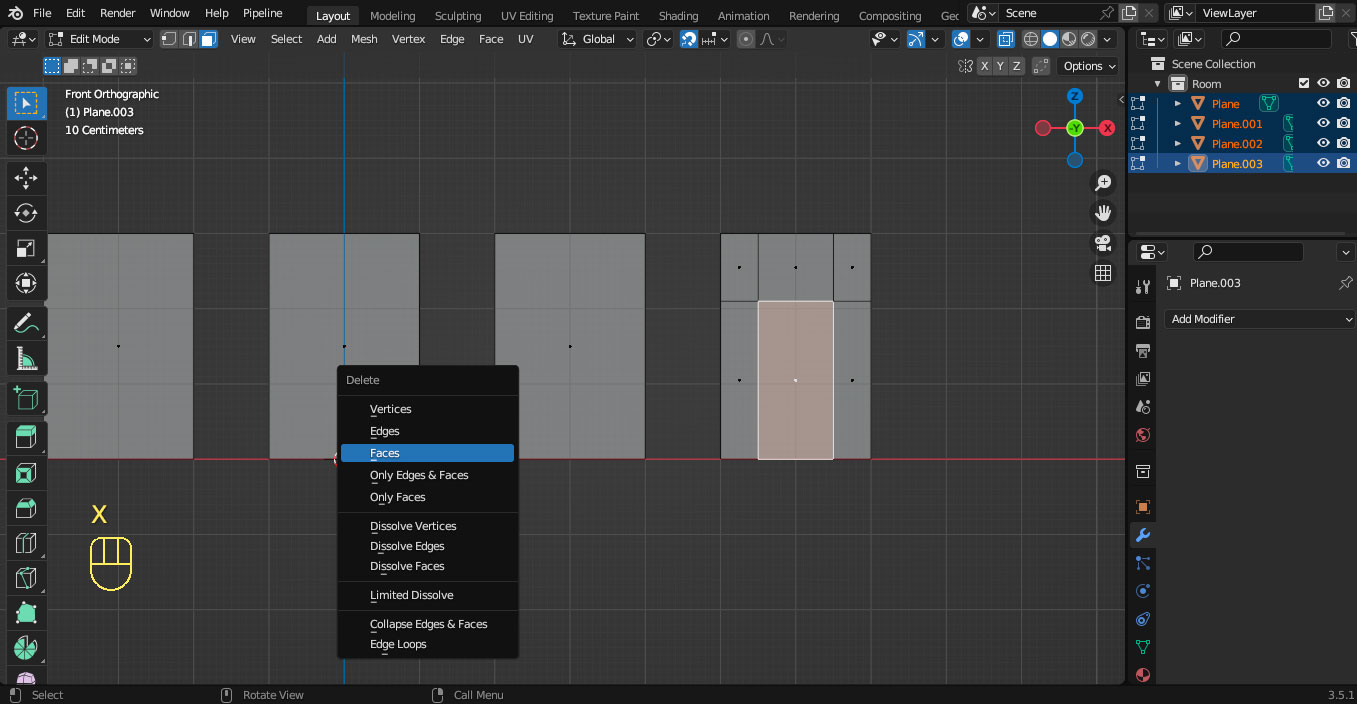
To do this, we take one of the previously created walls and apply some Loops with the key combination Ctrl + R, preferably in orthographic view to control the size of the hole where our door will be.

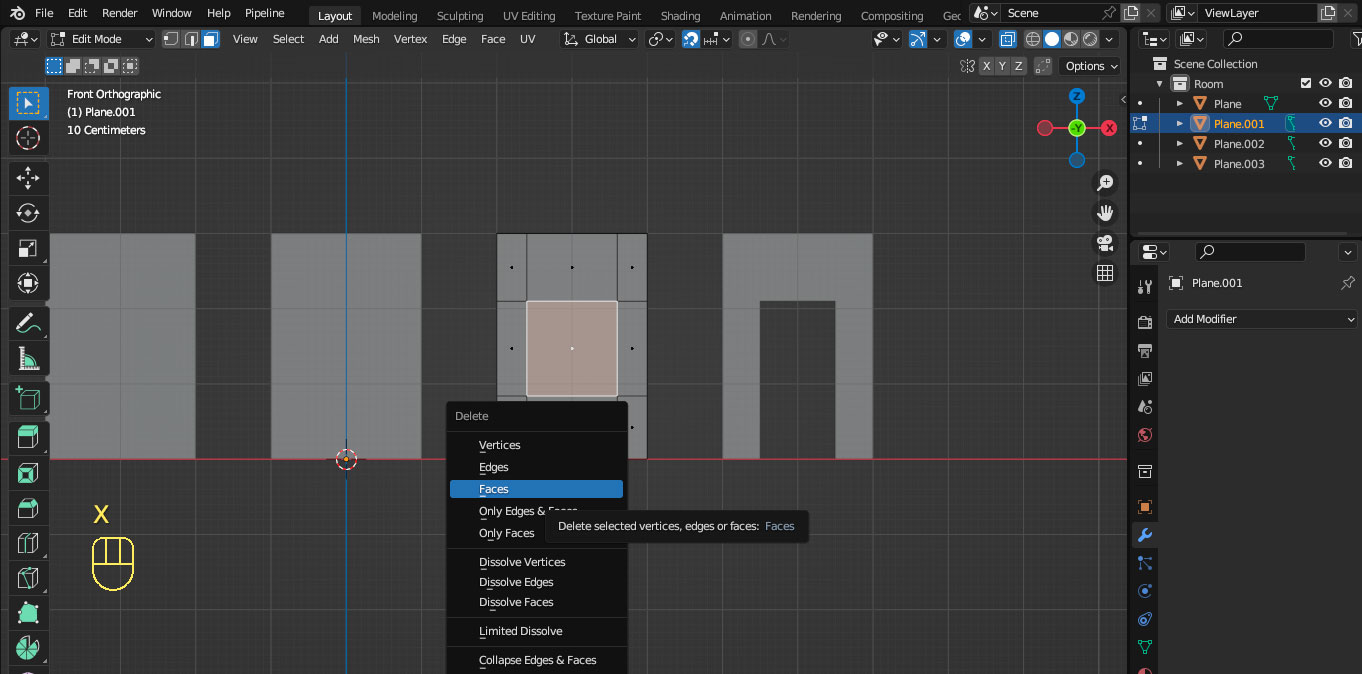
Once this is done, select the newly created face and by pressing the X key, select the Faces option and delete it.
Creation of the window space
To do this, we take another of the initially created walls and repeat the above procedure.
Nowadays, window sizes are variable, and the most modern house models include really large windows. However, for this case we will use the measurements of 120cm wide by 120 cm high.
As in the previous step, we eliminate the faces corresponding to the window hole.

Room creation
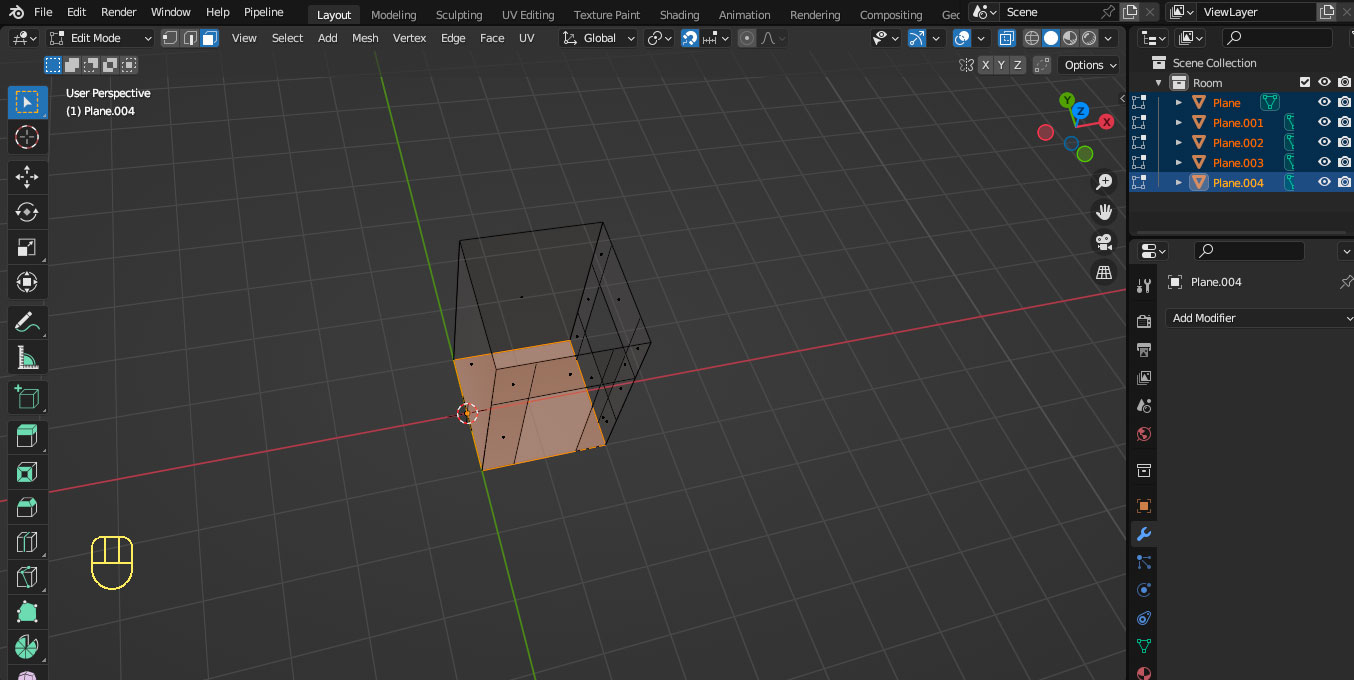
Once our 4 walls are created, we move and rotate them accordingly to form our little room.
At this point we can do it with the Snap tool still active, since the walls are the same size. But in some cases where the walls are of different sizes and compositions, it is preferable to disable this option and be guided by the Grid.

Floor creation
After that, we create the floor, for which we will use a plan again, making sure that it covers all the space between the walls. By pressing 7 on the numeric keypad, we will get a top orthographic view where we can check that the floor fits correctly.


Ceiling creation
In this case, we duplicate the floor and with the orthographic front view we raise the copy until it covers the top of the walls.


Verification of normals
At this point with the room created, it is important to verify that the visible faces of the walls, ceiling and floor are all facing inward. This is important because it not only ensures that the player inside the room will be able to see inside the room, but also because it enhances the performance of the project.
Let’s imagine that we are creating a house with several rooms, living room, dining room and kitchen. Doing it this way, there will be no unnecessary geometry in scene, since the back faces will not be shown between one room and another, so the number of vertices of the whole house will be reduced considerably.
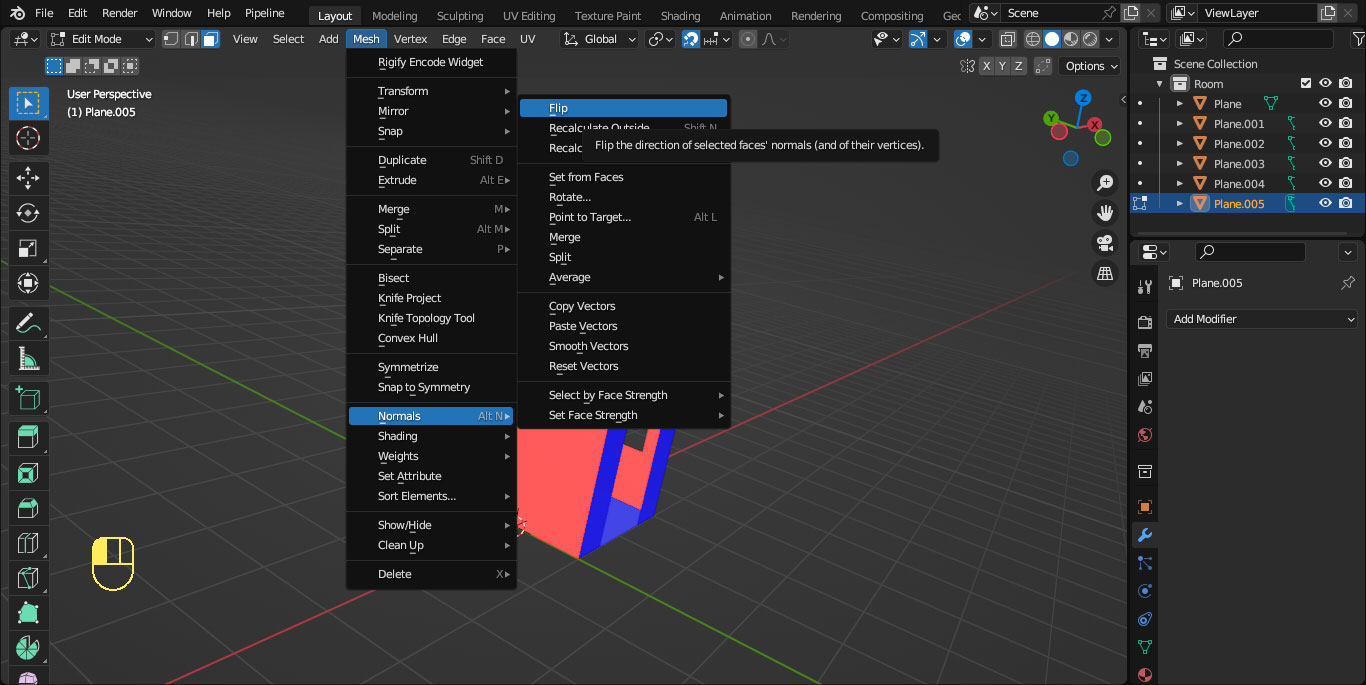
To check the normals, in the Viewport Overlays menu we check the Face Orientation option. Blue faces will be visible and red faces will not be displayed.

If we have an external blue face, we only need to select the face(s) and access the option Mesh -> Normals -> Flip.

Renaming and location
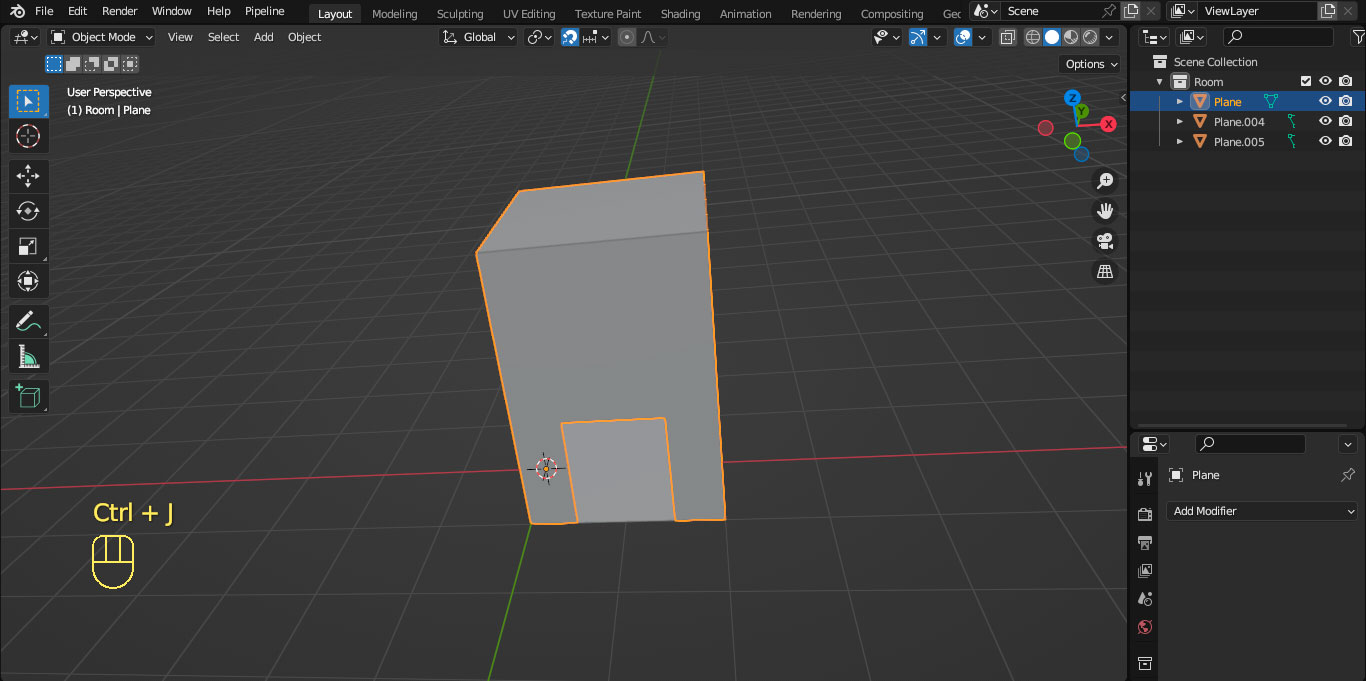
It is important to rename each piece of our room, so we will know to which part corresponds each geometry. In our case, we will join the pieces that correspond to the walls and leave separately the floor and the ceiling.
So, in Object Mode we select the walls and press the keyboard shortcut Ctrl + J. And we rename it “walls“.
Then, we rename the planes corresponding to the ceiling and floor.

Additionally, it will be important to place the model right in the center of the pivot. This way we ensure that when we export it to Unreal Engine all the geometry will keep its position.

Collision creation
To create the collisions, we will create a new collection called Collisions. And in Object Mode we will select all the elements of the house structure and duplicate them. That duplicate will be moved in its entirety to the new Collection created.

Now, for Unreal Engine to recognize the collisions each element that forms a part must be separated, and also each of them must be renamed with the prefix UCX followed by underscore ( _ ), the name of the part as it is called in the structure that we have just duplicated, another underscore ( _ ) and finally a consecutive number starting at 1.
To separate each part, in Edit Mode we will select each face and then press the P key.


If this is not done this way, and we use the collision that Unreal Engine creates by default when importing the object, the whole house will be taken as a big cube, where all the walls will form a solid collision without considering the door space.
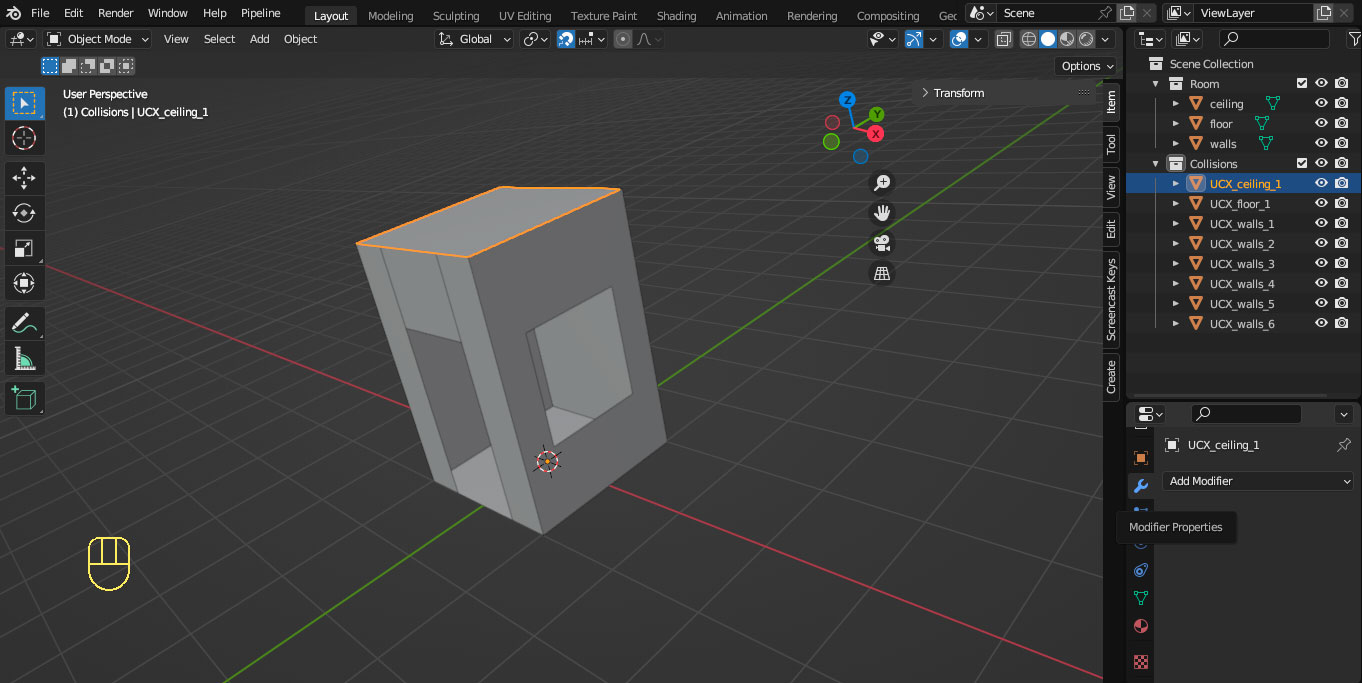
Applying Solidify modifier
Once each piece is renamed, as the purpose of these is that each one serves as an invisible wall, we will add some thickness to each one.
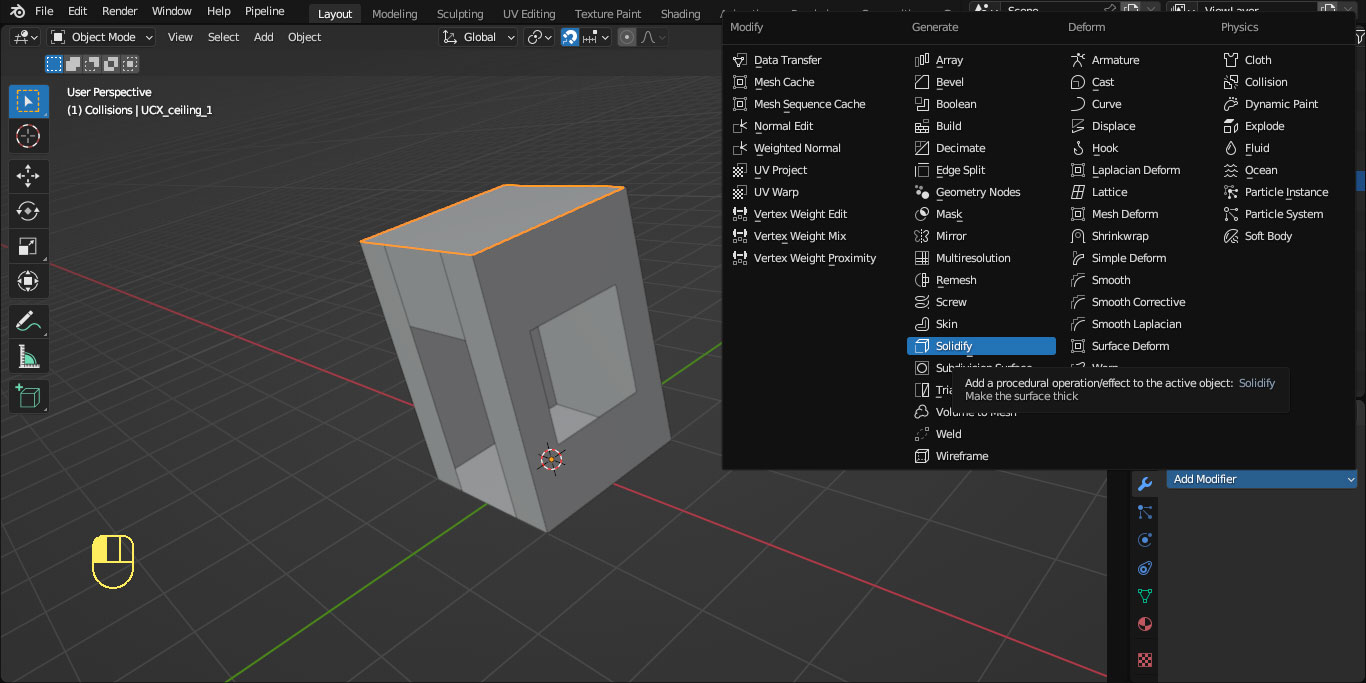
To do this, we select the first piece of the Collisions collection and assign the Solidify modifier, whose thickness parameter we will leave as it comes by default.
Then, with the Shift key pressed, we select all the remaining pieces of the collection, making sure that the one to which we add the modifier is the last one to be selected. It should be shown with a yellow border, while the rest will have an orange border.
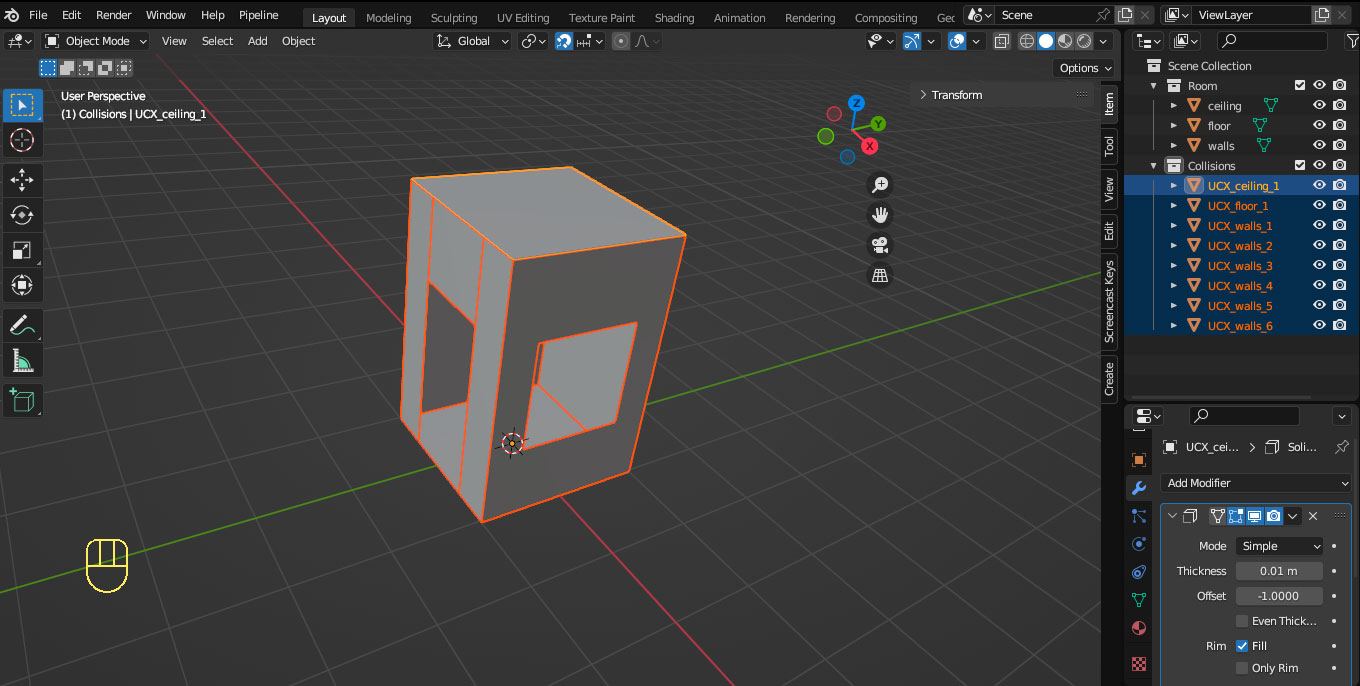
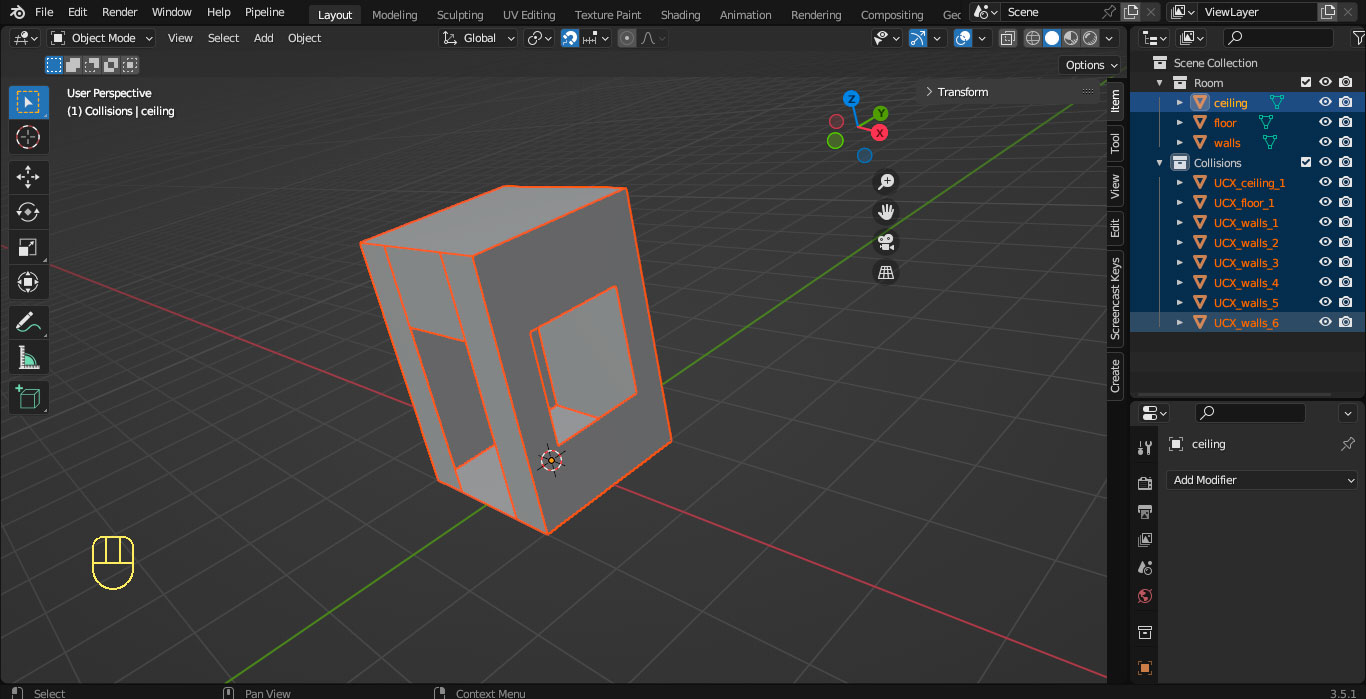
Next, we use the keyboard shortcut Ctrl + L and select the Copy Modifiers option. In this way, each of the parts will have adopted the Solidify modifier.

FBX file export
To export the room, while in Object Mode, and holding down the Shift key we select all the elements that compose our room, including the duplicates for collisions.
Then, we access the option File -> Export -> FBX (.fbx)

In the window that appears, select the destination path, give it a name and in the Include section check the Limit to Select Object option, and in the Object Types area check the Mesh option.
Finally we press the Export FBX button

Import into Unreal Engine 5
With the engine open, and having selected a development environment (in our case we selected third person to demonstrate how collisions work), we create a folder to import our object.
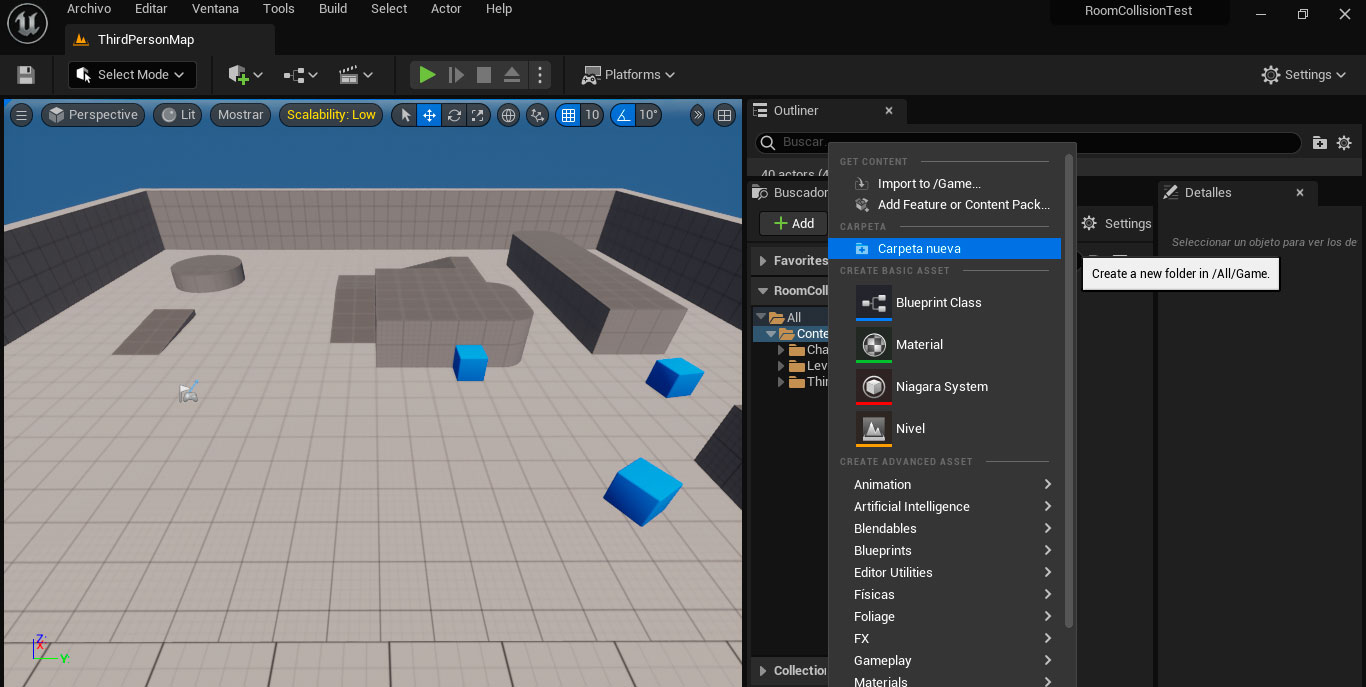
Select this folder and click on the Import button.

In the window that appears, select the file to import.
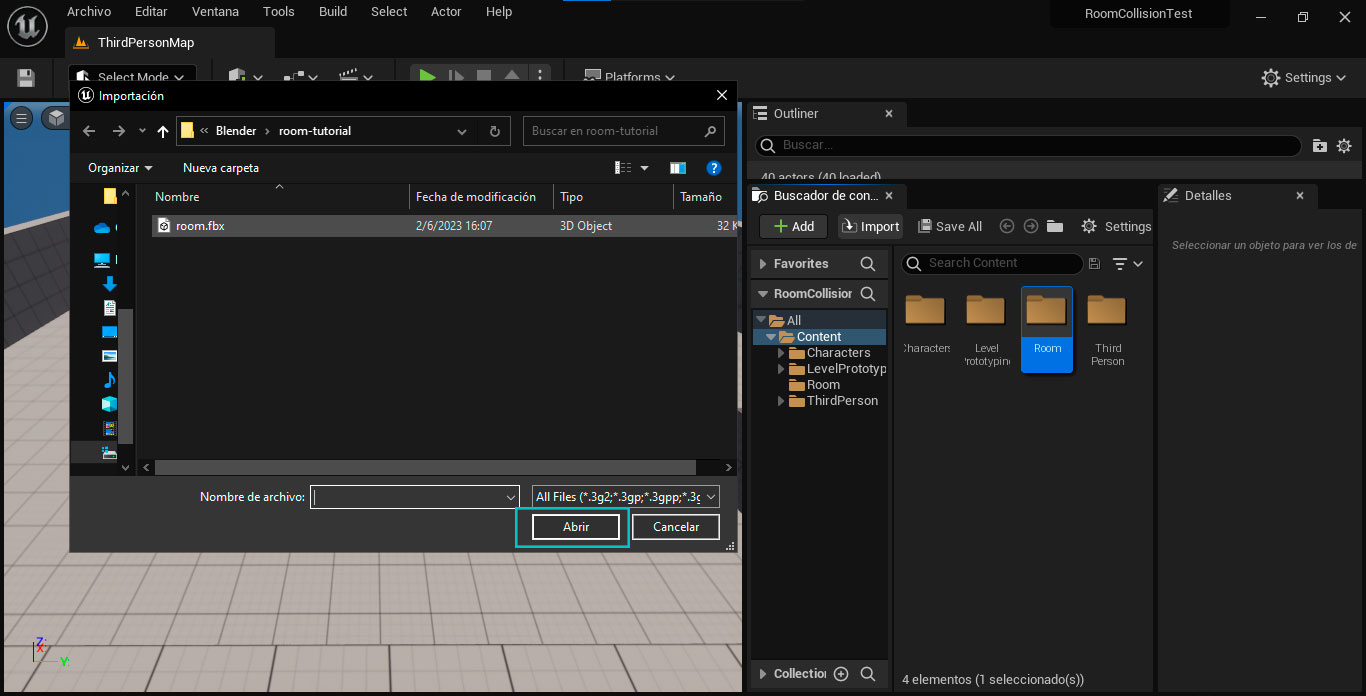
When clicking on the Open button, the import options will be shown, with the objective of keeping the collisions previously created in Blender, the most important thing will be to uncheck the Generate Missing Collision option that will be checked by default. After that, click on Import.

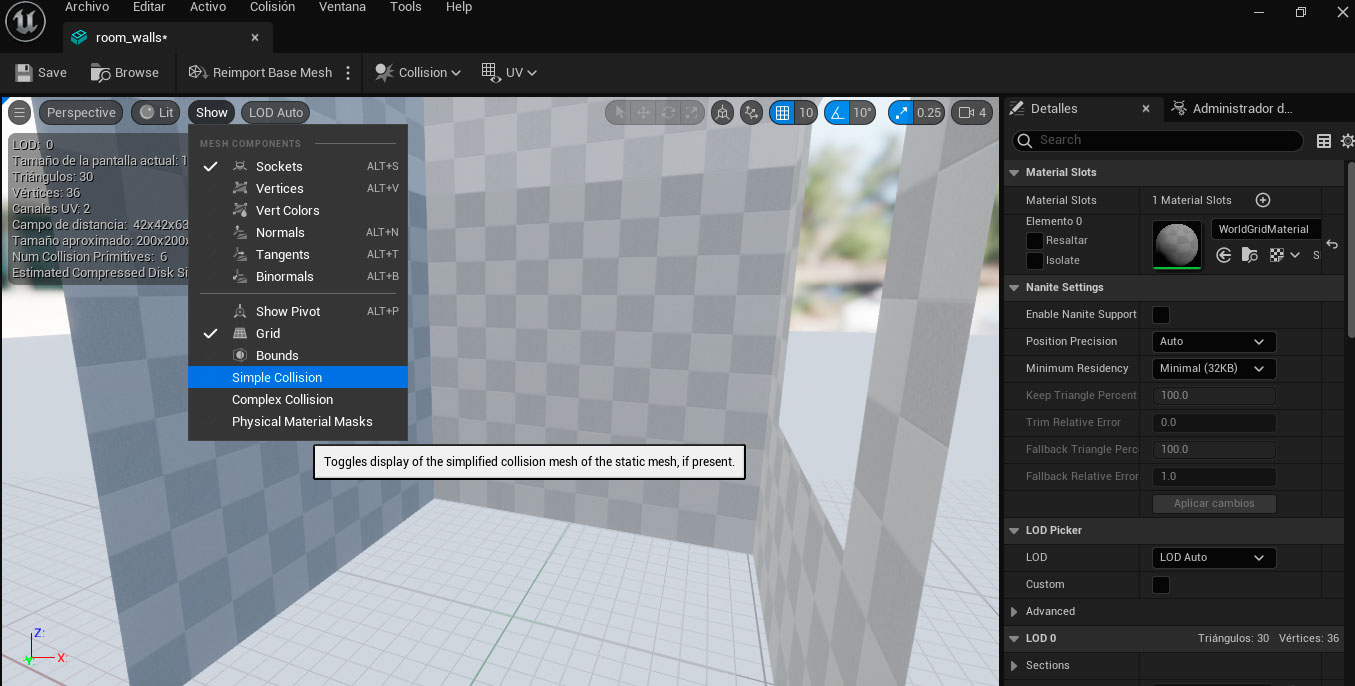
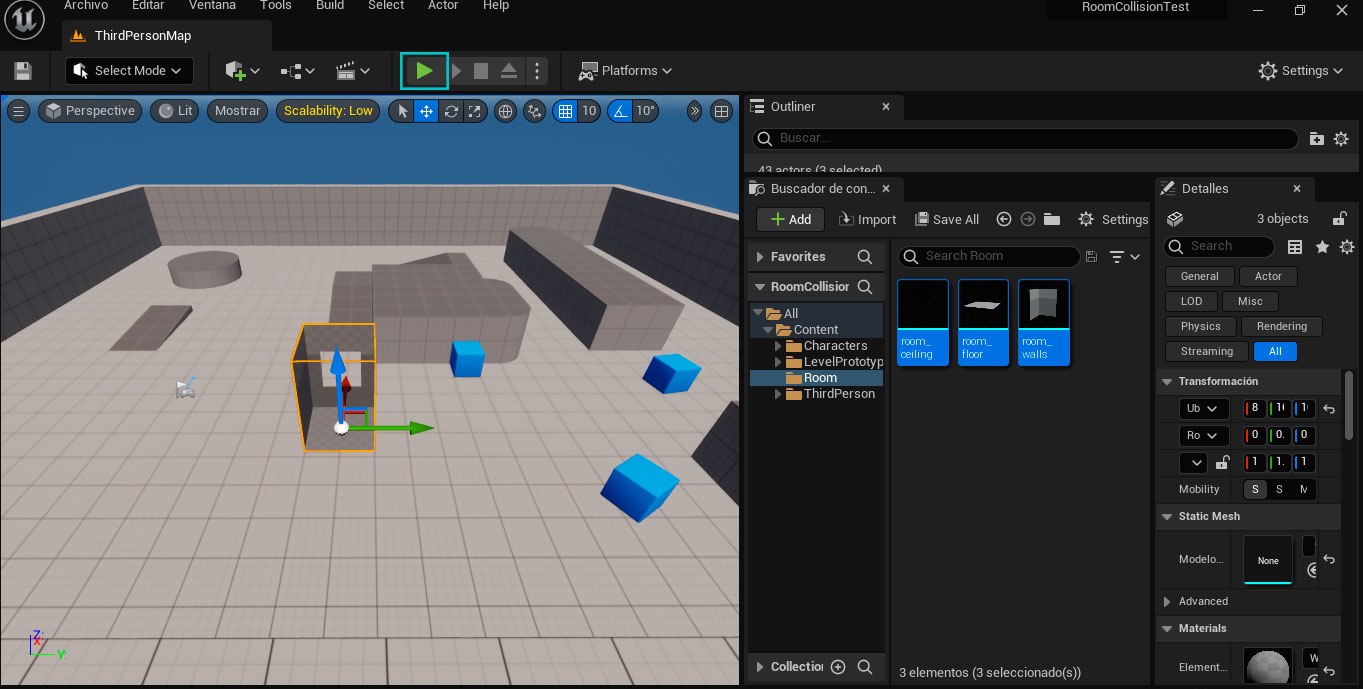
Once we have imported our object, we can double click on the static mesh “room_walls” to inspect it.
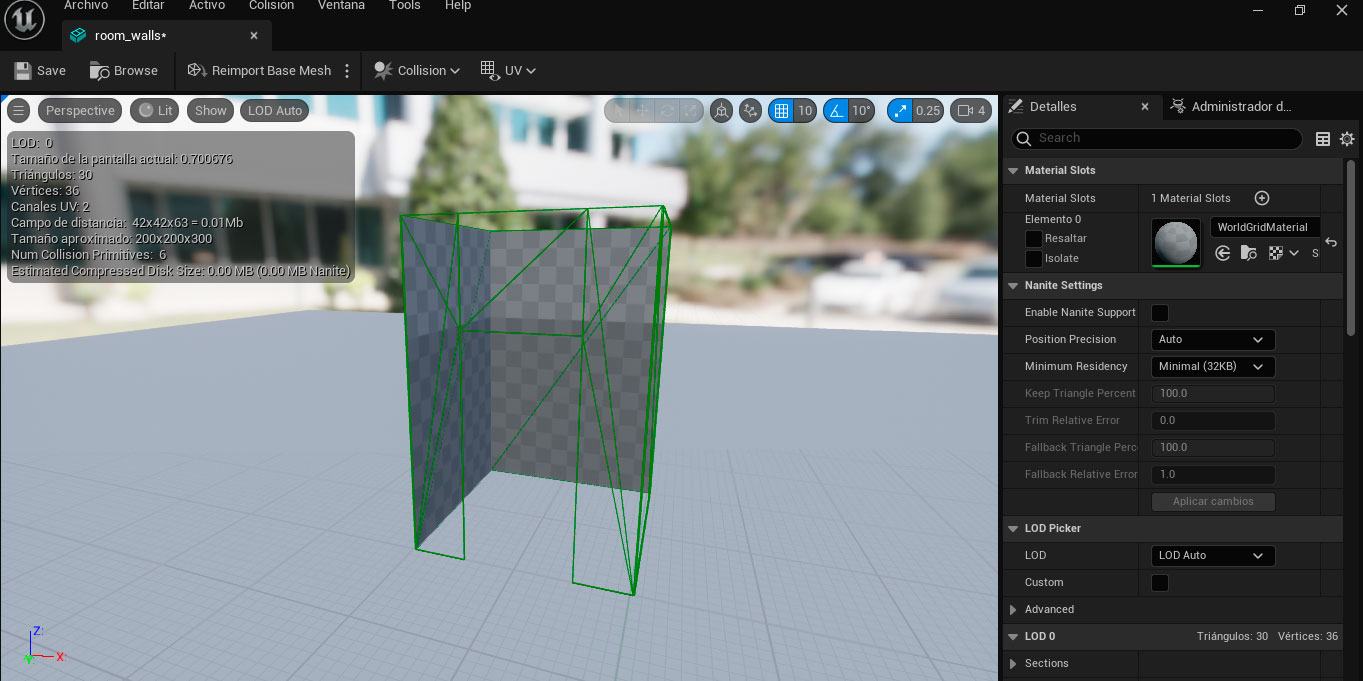
In the window that appears, we select the option Show -> Simple Collision and we will be able to notice how the door space has been respected in our collisions.
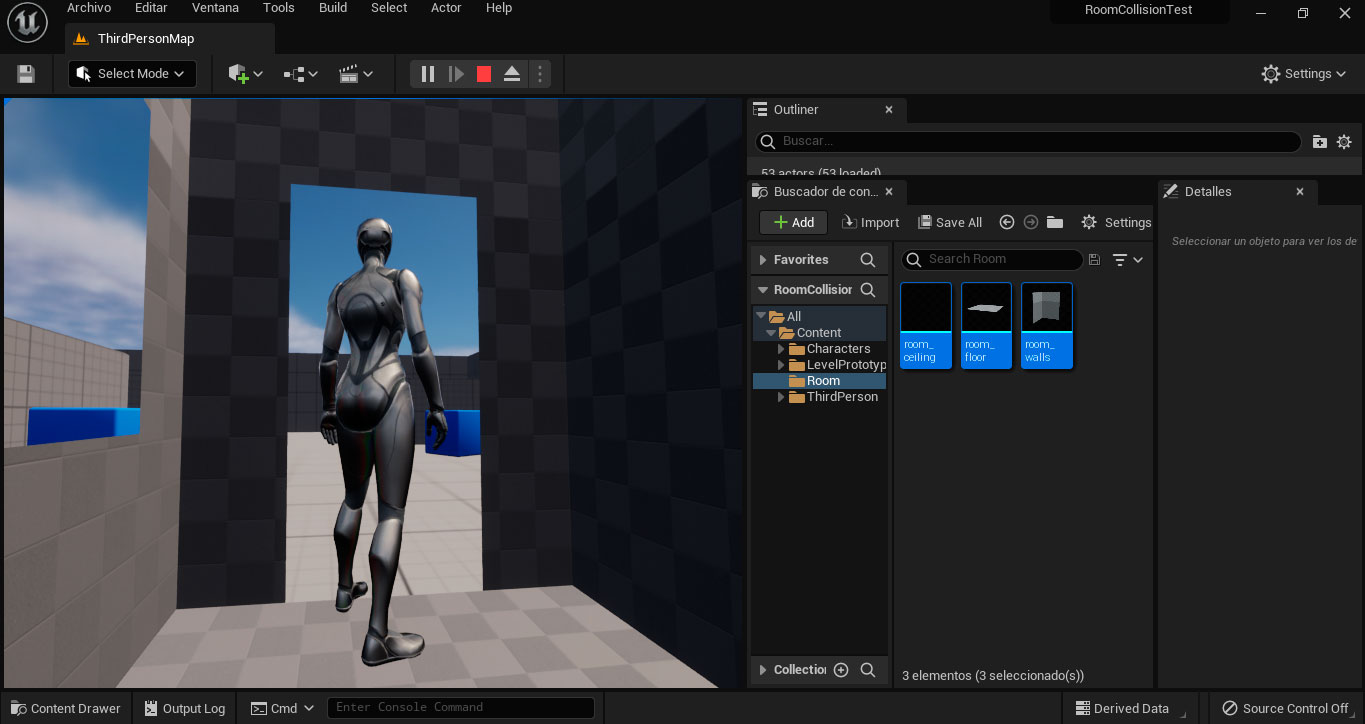
Next, close the previous window and drag the imported objects into the scene, and finally click the Play button.
Once this is done and we move around the escene, we will notice that the collisions work, and we can only access the room through the hole in the door. In addition, the interior of the room is the only visible part.
And that’s all, we hope that this small tutorial will serve as an introduction to the creation of more complex structures and that the steps explained here will make the process easier.
Here is the video with the complete process:
Thanks for reading, see you next time.